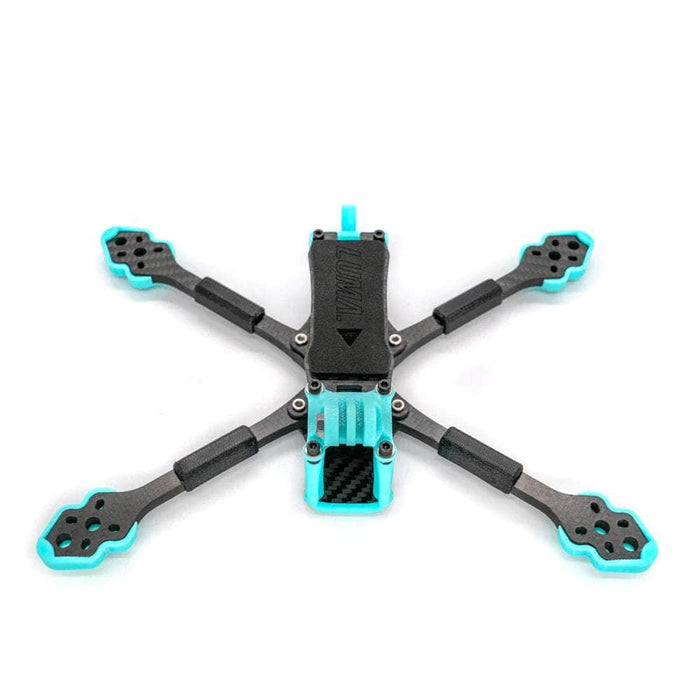
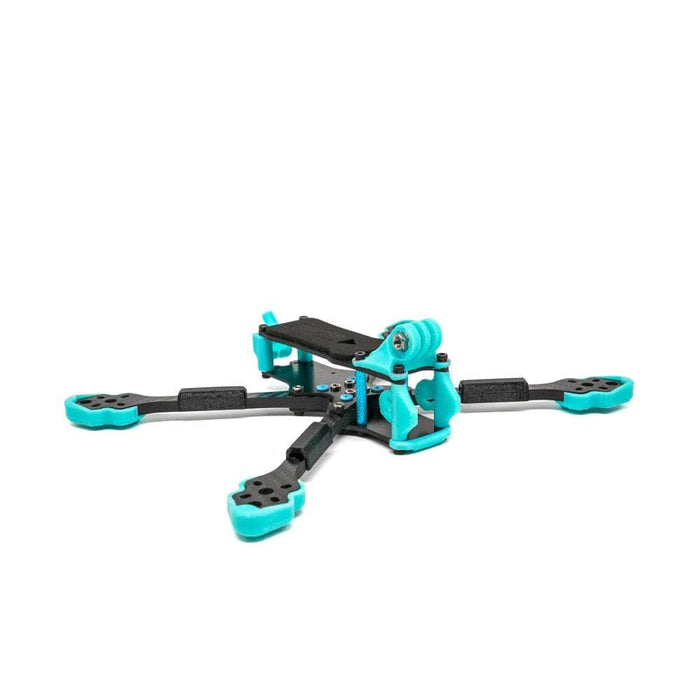
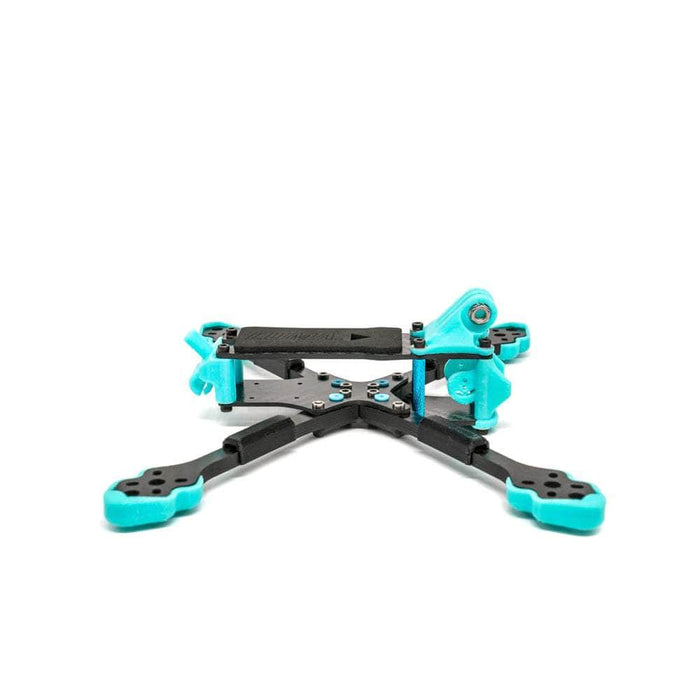
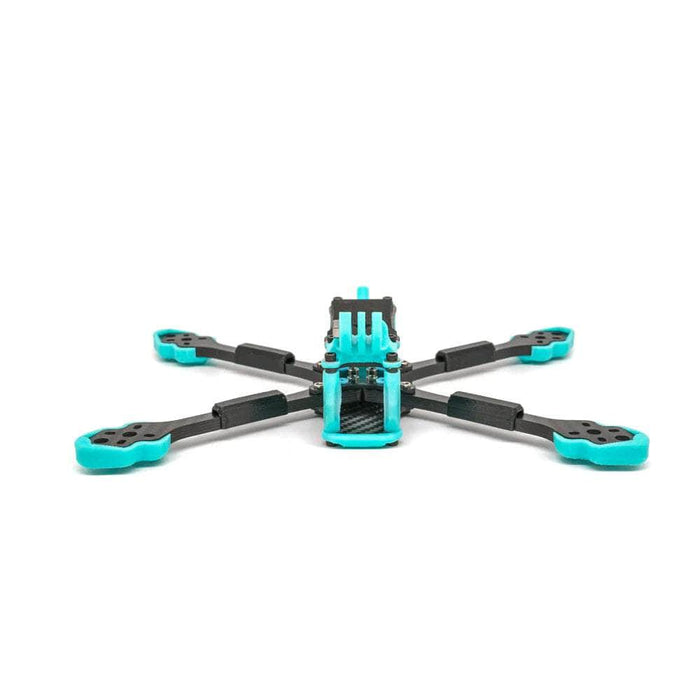
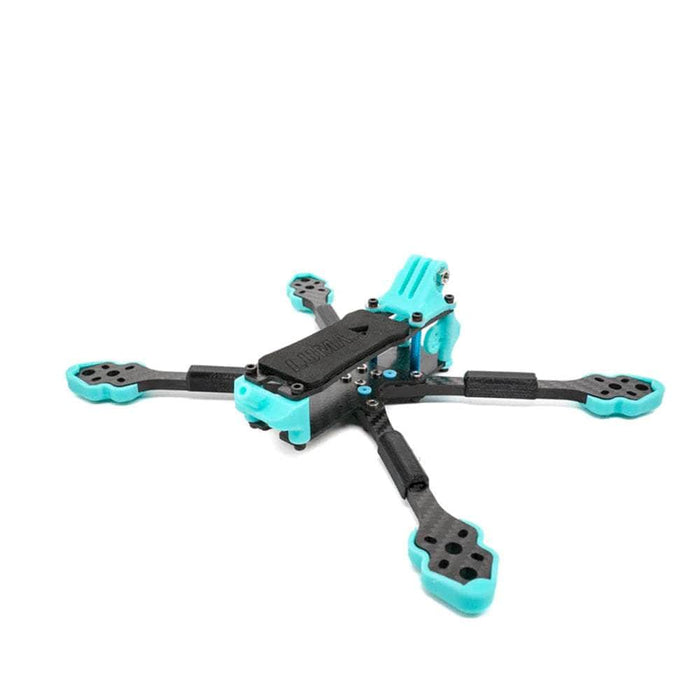
Luma Quads Luma 55 5.5" Freestyle Frame Kit
Take your drone filming to the next level with the Luma 55 freestyle frame kit. Offering superior performance and durability, it allows you to push the boundaries of traditional quadcopters and capture stunning visuals like never before. 5.5" provides extra thrust and performance beyond what a standard 5" can offer, to accommodate the heavier GoPro cameras we now love and use. The Luma 55 strikes a perfect balance between the agility of a 5-inch freestyle drone and the planted feel of a 6-inch cinematic cruiser, creating a harmonious blend of speed and stability perfect for cinematic work. With the Luma 55, you can effortlessly track and follow fast-moving subjects such as drift cars, boats, and motorbikes, capturing stunning footage with precision and ease.
Be sure to check out all our 5" frames, as well as our Luma Quads Products!
 Features
- Support for up to 5.5" props
- HD VISTA / Analog / DJI O3 Air Unit Compatible
- Replaceable 6x8mm arms. (single design)
- Vibration dampened main stack mounting
- The mounting support for the new Air Unit 03 Camera as well as other MINI to Nano sized FPV cameras
- T300 carbon frame
- YFS 12.9 grade steal hardware bolts
- Complete set of 3D prints for your quad
Specifications
- Stack Mounting: 20x20mm
- Rear Mounting: 20x20mm and 25.5x25.5mm
- Motor Mount Pattern: 16x16 and 19x19mm (M3)
- Mid Plate Thickness: 2mm
- Top and Bottom Plate Thickness: 2.5mm
- Motor to Motor: 245.7mm
- Arm Thickness: 6mm
- Frame Weight With TPU: 160g
Includes

Team Luma is proud to bring all Luma 55 pilots a new Betaflight tune for 4.4!
Along with the improvements to GPS rescue and HD integration, 4.4 has had a complete overhaul of the PID controller, which means that a new tune was required to allow for optimum performance. Much like the previous tune for Betaflight 4.2, this revised tune was completed in collaboration with none other than Team Luma pilot Joseph Webb (otherwise known as JWebb FPV), and has been pushed to its absolute limits. Joseph is a true legend in the Australian drone industry. Known for his incredible freestyle piloting skills and unmatched expertise in Betaflight tune development, he is a valuable contributor to our mission of creating the most outstanding products for our entire community.
Check out Joseph here: https://www.instagram.com/jwebb.fpv/ and his YT Channel here: https://www.youtube.com/@JWebbFPV and show him some love!
Notes:
- This tune was deveolped using 2306.5 Size motors.
- To allow for optimum performance, we recommend installing a 1000μF 35V Low ESR capacitor, along with a TVS diode.
- Be sure to use the latest BF Configurator (we're using 10.9.0)
- Ensure that you cross-reference the values after the CLI dump with the screenshots below (better safe than sorry!)
- Filters were left untouched to ensure that the tune had proper continuity between builds. If you are looking to extract more performance, or attempting to rectify an issue, add more or less filtering via the sliders as required.
- Make sure that you test hover the Luma 55 in a safe area, and check motor temperatures after 20-30 seconds. If they are hot to the touch, then do NOT proceed - ensure the build is up to scratch, and if the issue persists, get in contact and we'll do our best to point you in the right direction
Thank you for your continued support.
DISCLAIMER: LumaQuad does not hold responsibility or liability for any mechanical damage to your personal setup - this tune has been tested and verified on multiple setups to ensure that it is safe for customers.
4.4 Tune (Official v1.0)
CLI Input.
set dterm_lpf1_dyn_min_hz = 0
set dterm_lpf1_dyn_max_hz = 0
set dterm_lpf1_dyn_expo = 0
set dterm_lpf1_type = PT1
set dterm_lpf1_static_hz = 75
set dterm_lpf2_type = PT1
set dterm_lpf2_static_hz = 150
set dterm_notch_hz = 0
set dterm_notch_cutoff = 0
set vbat_sag_compensation = 0
set pid_at_min_throttle = ON
set anti_gravity_gain = 65
set anti_gravity_cutoff_hz = 5
set anti_gravity_p_gain = 100
set acc_limit_yaw = 0
set acc_limit = 0
set crash_dthreshold = 50
set crash_gthreshold = 400
set crash_setpoint_threshold = 350
set crash_time = 500
set crash_delay = 0
set crash_recovery_angle = 10
set crash_recovery_rate = 100
set crash_limit_yaw = 200
set crash_recovery = OFF
set iterm_rotation = OFF
set iterm_relax = RP
set iterm_relax_type = SETPOINT
set iterm_relax_cutoff = 14
set iterm_windup = 85
set iterm_limit = 400
set pidsum_limit = 500
set pidsum_limit_yaw = 400
set yaw_lowpass_hz = 100
set throttle_boost = 5
set throttle_boost_cutoff = 15
set p_pitch = 50
set i_pitch = 55
set d_pitch = 33
set f_pitch = 115
set p_roll = 48
set i_roll = 60
set d_roll = 30
set f_roll = 120
set p_yaw = 47
set i_yaw = 60
set d_yaw = 0
set f_yaw = 100
set angle_level_strength = 50
set horizon_level_strength = 50
set horizon_transition = 75
set level_limit = 55
set horizon_tilt_effect = 75
set horizon_tilt_expert_mode = OFF
set abs_control_gain = 0
set abs_control_limit = 90
set abs_control_error_limit = 20
set abs_control_cutoff = 11
set use_integrated_yaw = OFF
set integrated_yaw_relax = 200
set d_min_roll = 23
set d_min_pitch = 27
set d_min_yaw = 0
set d_max_gain = 37
set d_max_advance = 20
set motor_output_limit = 90
set auto_profile_cell_count = 0
set launch_control_mode = NORMAL
set launch_trigger_allow_reset = ON
set launch_trigger_throttle_percent = 20
set launch_angle_limit = 0
set launch_control_gain = 40
set thrust_linear = 0
set transient_throttle_limit = 0
set feedforward_transition = 0
set feedforward_averaging = OFF
set feedforward_smooth_factor = 25
set feedforward_jitter_factor = 7
set feedforward_boost = 15
set feedforward_max_rate_limit = 90
set dyn_idle_min_rpm = 0
set dyn_idle_p_gain = 50
set dyn_idle_i_gain = 50
set dyn_idle_d_gain = 50
set dyn_idle_max_increase = 150
set level_race_mode = OFF
set simplified_pids_mode = OFF
set simplified_master_multiplier = 100
set simplified_i_gain = 75
set simplified_d_gain = 110
set simplified_pi_gain = 115
set simplified_dmax_gain = 0
set simplified_feedforward_gain = 90
set simplified_pitch_d_gain = 100
set simplified_pitch_pi_gain = 110
set simplified_dterm_filter = ON
set simplified_dterm_filter_multiplier = 100
set tpa_mode = PD
set tpa_rate = 30
set tpa_breakpoint = 1350


Legacy 4.29 Tune (v1.0)
CLI Input.
# profile 0
set dyn_lpf_dterm_min_hz = 80
set dyn_lpf_dterm_max_hz = 200
set dyn_lpf_dterm_curve_expo = 8
set dterm_lowpass2_hz = 250
set anti_gravity_gain = 6500
set feedforward_transition = 38
set iterm_relax_cutoff = 13
set p_pitch = 68
set i_pitch = 102
set f_pitch = 80
set p_roll = 65
set i_roll = 100
set d_roll = 37
set f_roll = 80
set p_yaw = 50
set i_yaw = 80
set f_yaw = 80
set d_min_roll = 0
set d_min_pitch = 0

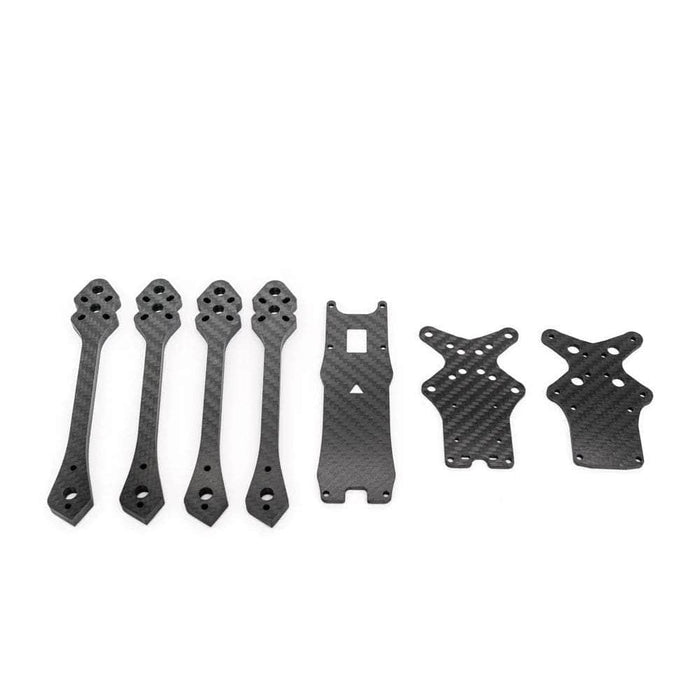
Kit contents:
| Hardware: | Carbon: | ||
| 4x | 28mm Aluminum standoff. | 1x | 2.5mm Top-plate. |
| 2x | 20mm Aluminum standoff. | 1x | 2mm Mid-plate. |
| 9x | Steel M3 12mm. (12.9 grade) | 1x | 2.5mm Bottom-plate. |
| 5x | Steel M3 8mm. (12.9 grade) | 4x | 6x8mm Arms. |
| 9x | Steel M3 10mm. (12.9 grade) | ||
| 7x | M3 Steel Washer. | ||
| 9x | M3 Steel Pressnut. | Extras: | |
| 5x | M3 Silicone soft-mount gummies. | 1x |
3mm Foam Battery Pad |
| 1x | M5 Steel Clinch Nut. | 2x | Luma 250mm Lipo Straps. |
| 1x | M5 20mm Flathead Bolt. | ||
| 5x | M3 Steel 20mm. (12.9 grade) | ||
| 5x | M2 Steel 20mm. (12.9 grade) | ||
| 5x | M2 Steel Nut | ||
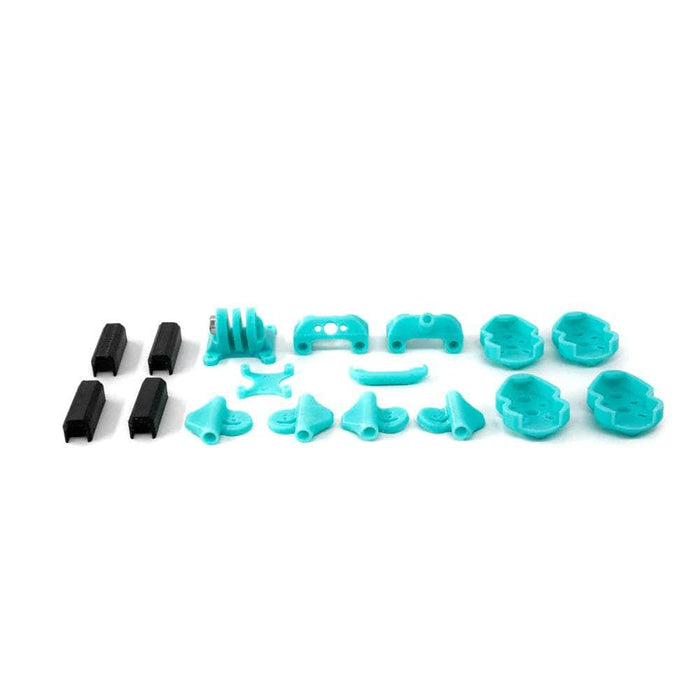
| TPU parts: | |||
| 1x | Front bumper. | ||
| 4x | Arm Bumpers. | ||
| 4x | Arm Wire Protectors. | ||
| 4x | Mini to Nano FPV camera mounts. | ||
| 1x | Front GoPro Hard mount. | ||
| 1x | Rear Vista antenna and T mount | ||
| 1x | Rear SMA antenna and T mount | ||
| 1x | 20x20 M3 stack RX mount. | ||
| 1x | 20x20 M2 stack RX mount. |
LUMA 55 BUILD GUIDE v1.0
This is the Mid plate.
Note the notch at the top of the image, this indicates the back of the frame.

It has no notch and the flat end at the bottom indicates the front of the frame.
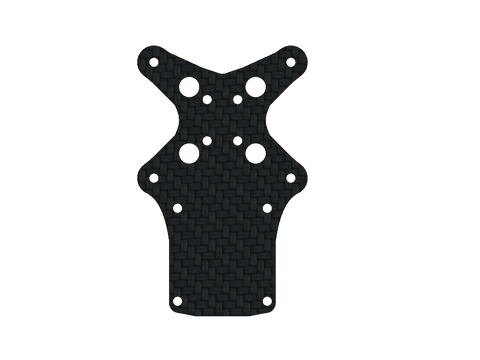
Install 8x Press nuts into the 8x holes in the Mid plate as follows.


Check out the following Video from Phaser FPV For the correct way to install Press nuts into the carbon Mid plate..
DO NOT USE A HAMMER!
Install The Main stack Gummies:


Check out the following video for the correct way to install Gummies into the carbon Mid plate using Dental floss or Fishing wire.
The video shows installation into an FC/ESC.. this technique is the same for carbon.
Insert 8x 12mm M3 Cap head bolts through the Bottom plate.


Note: A single design is used for all 4 arms.
Orientate them so the rounded corners go on the top and bottom and the sharper corners are on the sides.

Attach each arm to the Bottom plate over the 12mm bolts.


Place the Mid plate loosely on top.

Flip the frame over and pick up any bolts you dropped ;)

Screw each 12 MM bolt in a single turn at a time using Loctite Blue 242 Threadlocker.
Work your way around multiple times until the whole thing comes together evenly.
Once everything's locked in nice and square you can go around and give it a final tighten.


Take 4x 10mm Bolts 2x M3 washers and the Front Bumper print.

Install washers on the front two bolts and insert through the Bumper into the bottom of the Bottom plate.
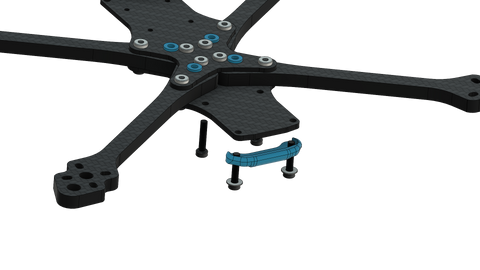

Secure with 4x 28mm Standoffs.


Insert your FPV camera mounts over the front 2 standoffs.


Grab 2x 8mm Bolts and do the same for the rear 2 holes, using 2x 20mm standoffs to secure.


Insert the rear antenna mount over the rear standoffs.


Insert 4x 20mm M3 bolts through the main stack gummies, twist gently and slowly so you don't pop the gummies out.


Use stack spacer prints if required to add some clearance so your ESC sits clear of the press nuts and carbon.


Install the Top-plate, triangle pointing to the front.

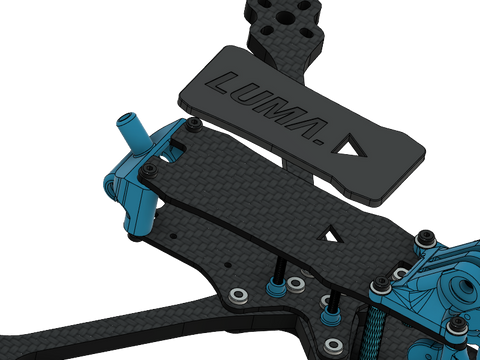
Grab 4x 10mm M3 bolts, 4x M3 Washers and the HD Mount Print.
Insert the 4 bolts through the 4 washers into the top of the mount and secure to the 4 28mm Standoffs.


Use 2x 8mm M3 bolts for the rear two holes.


Line up the Lipo pad with the triangle and stick it to the Top plate

Insert the M5 Clinch nut into the HD mount print.
Note: The nut will seat inside the lip of the print and not fall out if you seat it properly, use a little force to get it past the lip.


Arm bumpers go on the end of the arms.


The Printed Arm wire guards go over the motor wires and are secured with electrical tape.


